Building an Office Sign-In in Dark
We’ve just released a demo video of Dark. The demo is building out an office sign in application. You choose who you’re visiting (a host) and sign in with your name.
I highly recommend watching the video instead of reading this.
But… since the video moves quickly, we wanted to provide an easier way to see what’s going on. Also some people (*cough* me) won’t watch the video no matter how many times you tell them it’s useful.
Hello World
Before I get started in any new language, I like to make sure I’ve got the basics (like a hello world).
Let’s start by setting up a “hello world” JSON API in less than ten seconds:
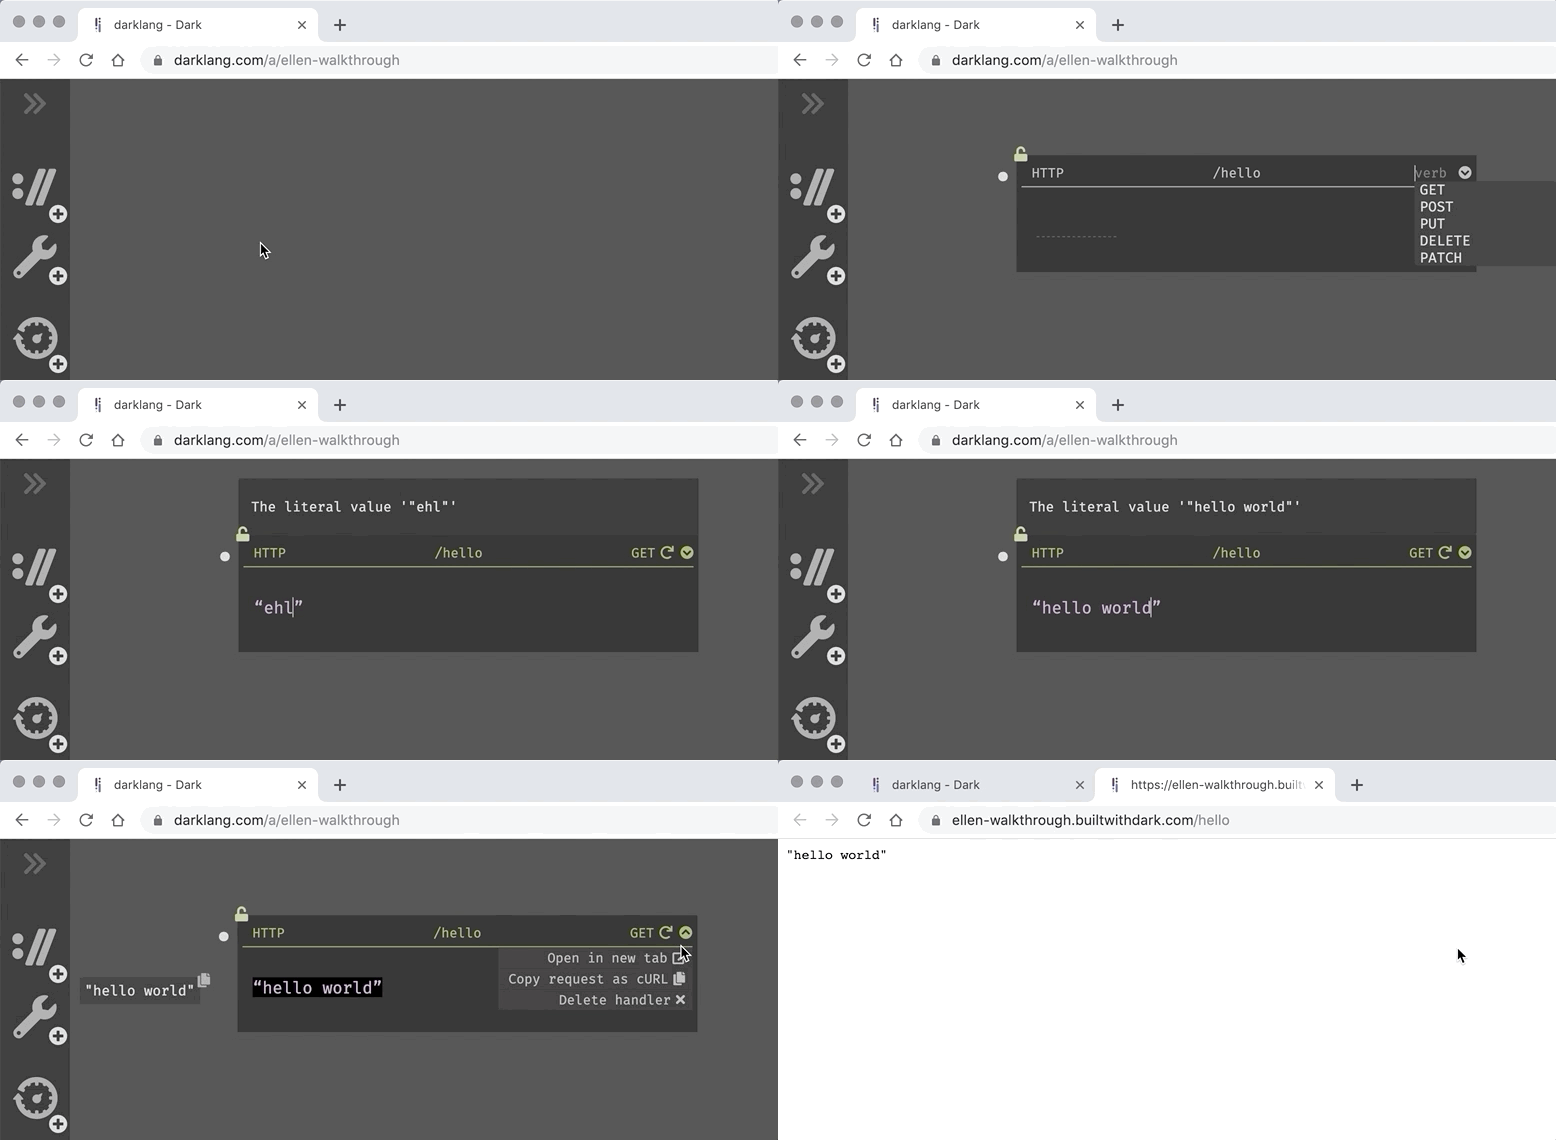
In fact, you can write as much code as you want in a handler.
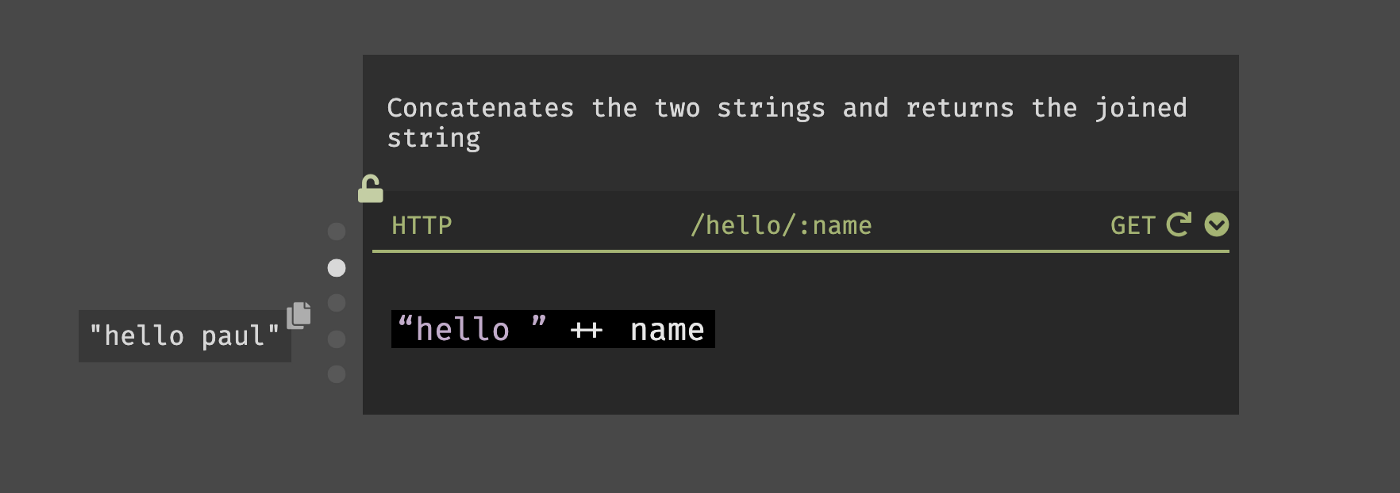
Each of the white dots on the left of a handler is a recent trace, and the live value to the left shows what an expression would evaluate to for the selected trace (in this case, “hello paul”).
Using Dark with your Frontend
Dark’s traces and live values make it really easy to built out a backend from an existing frontend.
Dark is frontend agnostic. You can use Dark with React, Vue, vanilla Javascript, Elm, or anything else. You point your API host at your Dark backend.
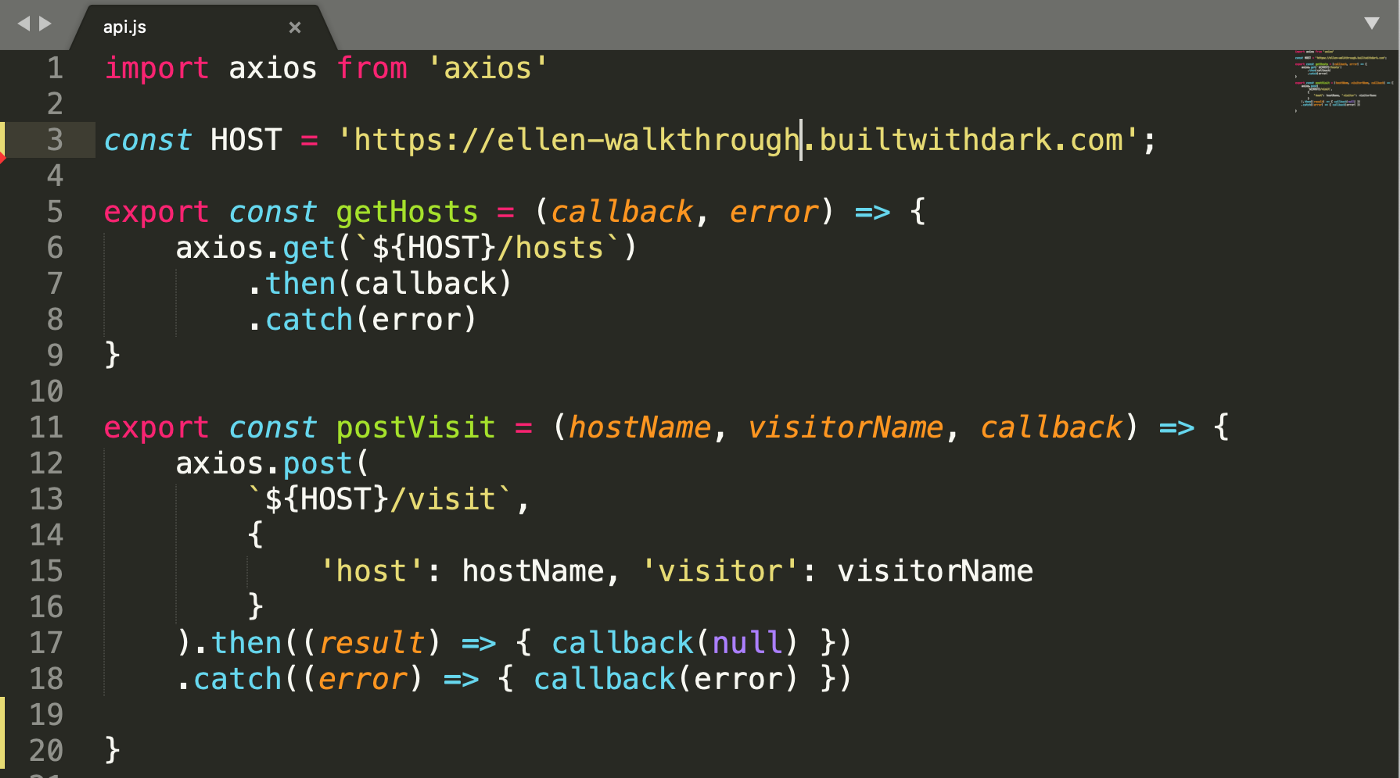
Dark hosts your compiled Javascript; you upload your compiled assets to our CDN from the command line.
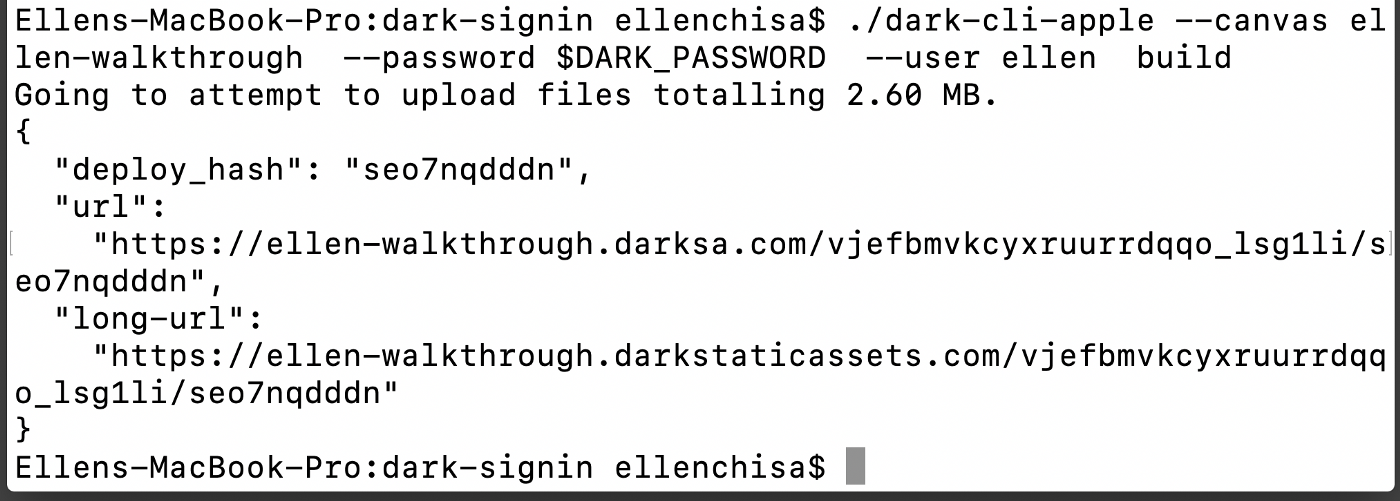
We have now uploaded our app and served it from https://ellen-walkthrough.builtwithdark.com
At this point in my demo, the frontend looks like this:

Setting up a Hosts API
Let’s create an endpoint from our failed request’s trace.

Let’s jump to the completed hosts functionality.
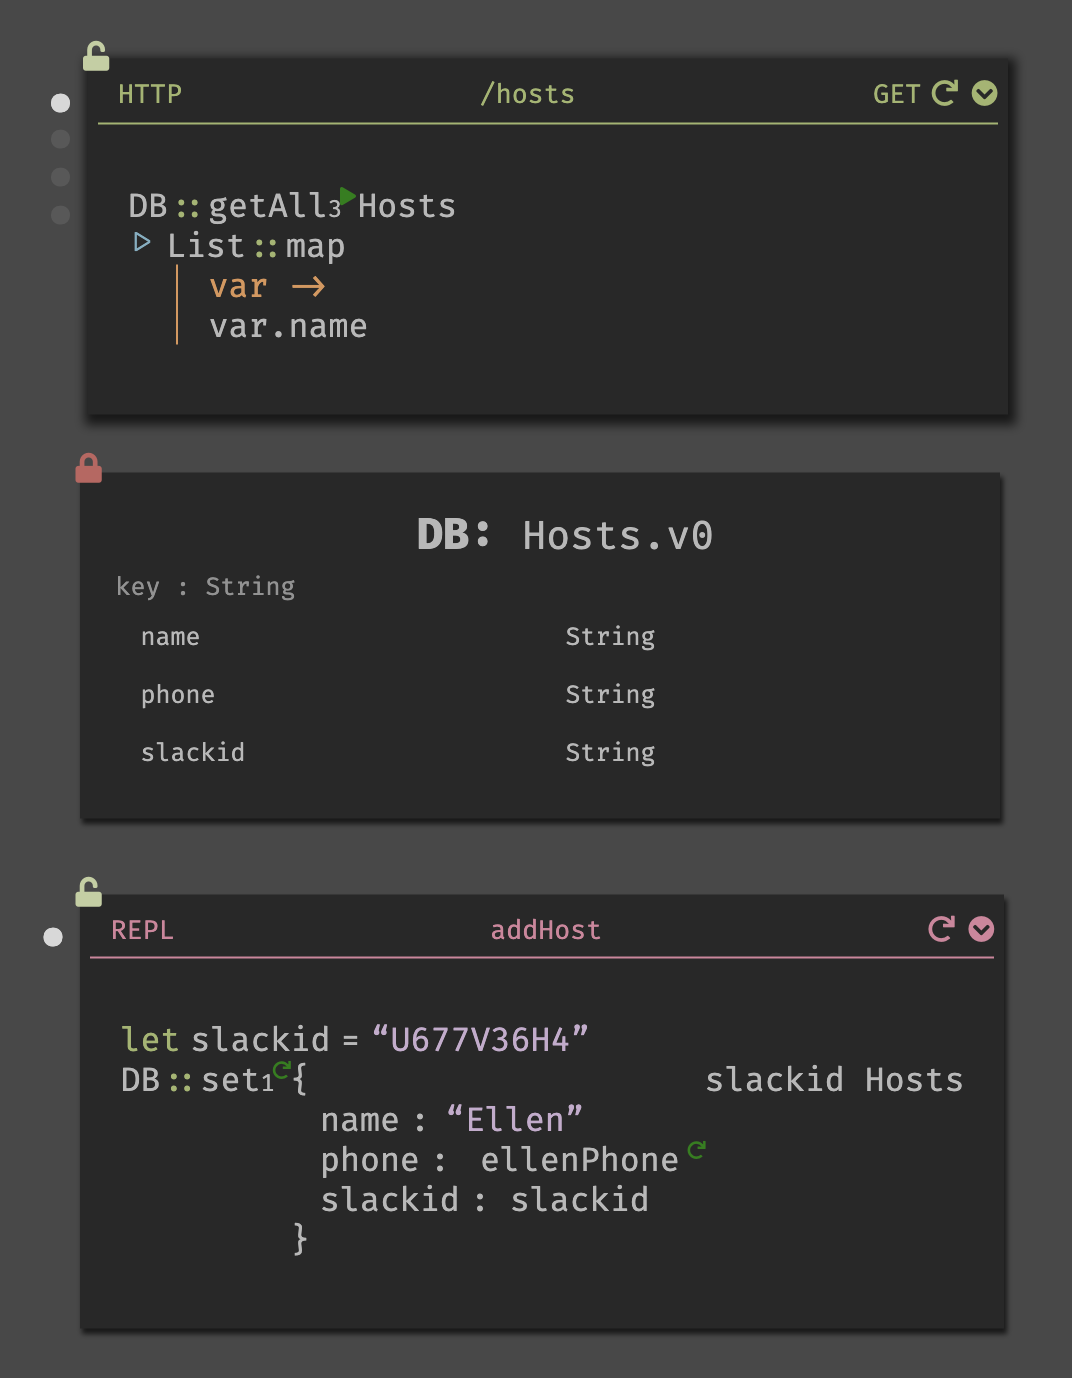
We created a hosts API endpoint, a Hosts datastore, and an addHost internal tool for adding more hosts to our datastore (we refer to these as REPLs).
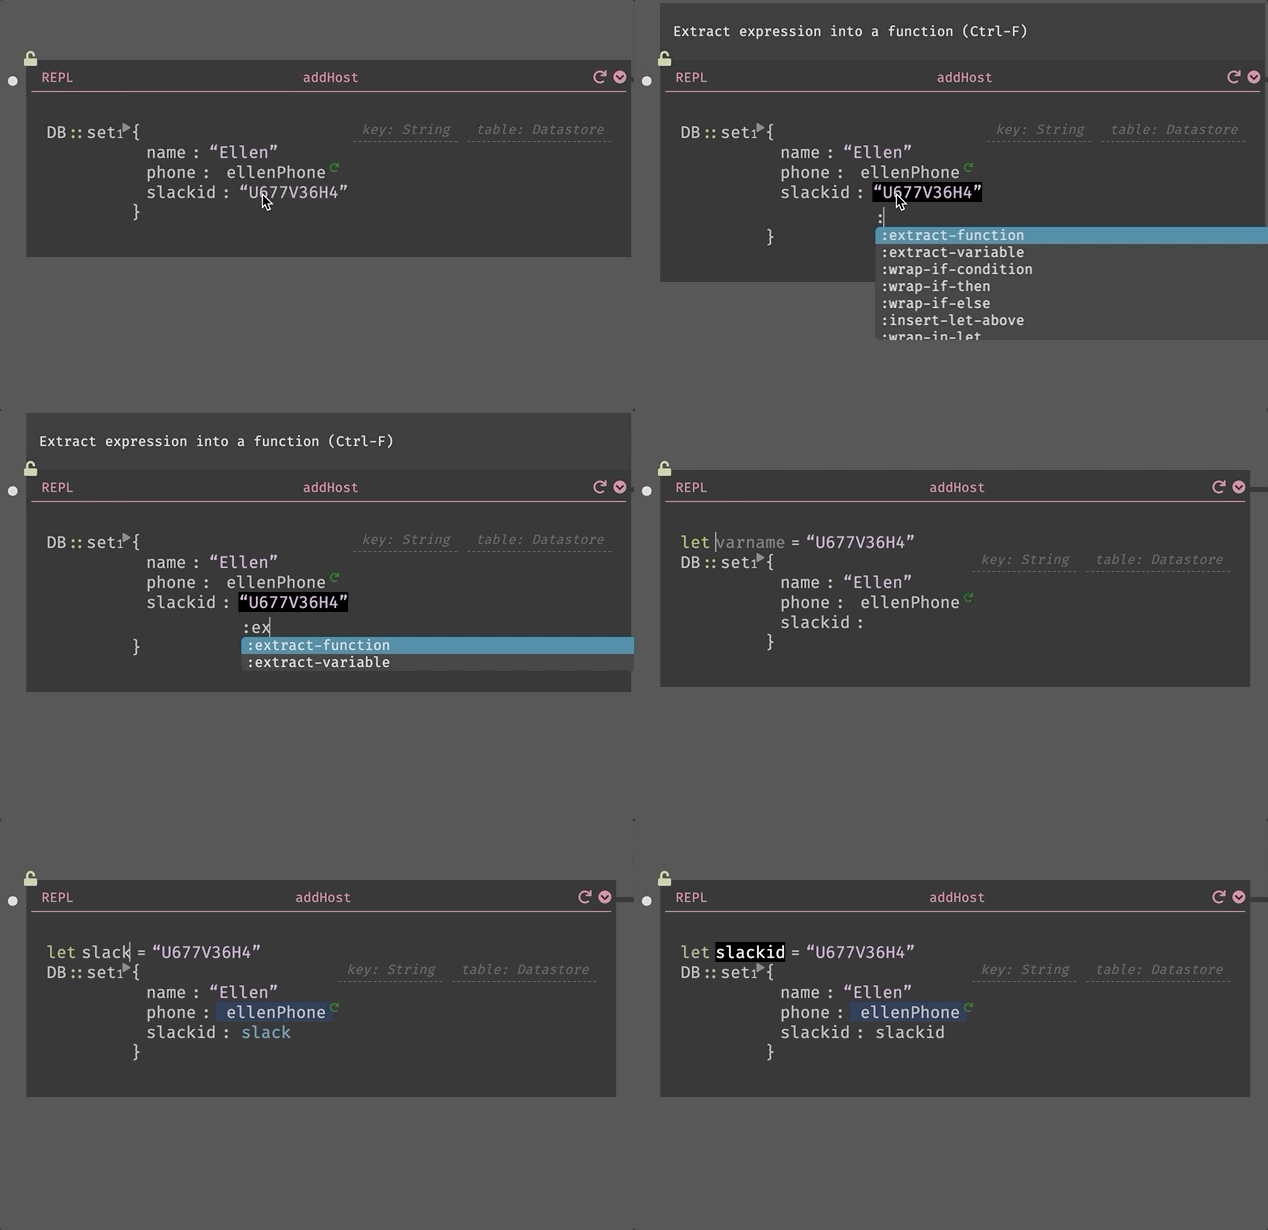
In the addHost REPL, our datastore key is the variable slackid. Let me show you a cool Dark feature: we wanted to reuse the Slack ID, so we extracted it into a variable. Here’s what that looked like:
Setting up the Visits API
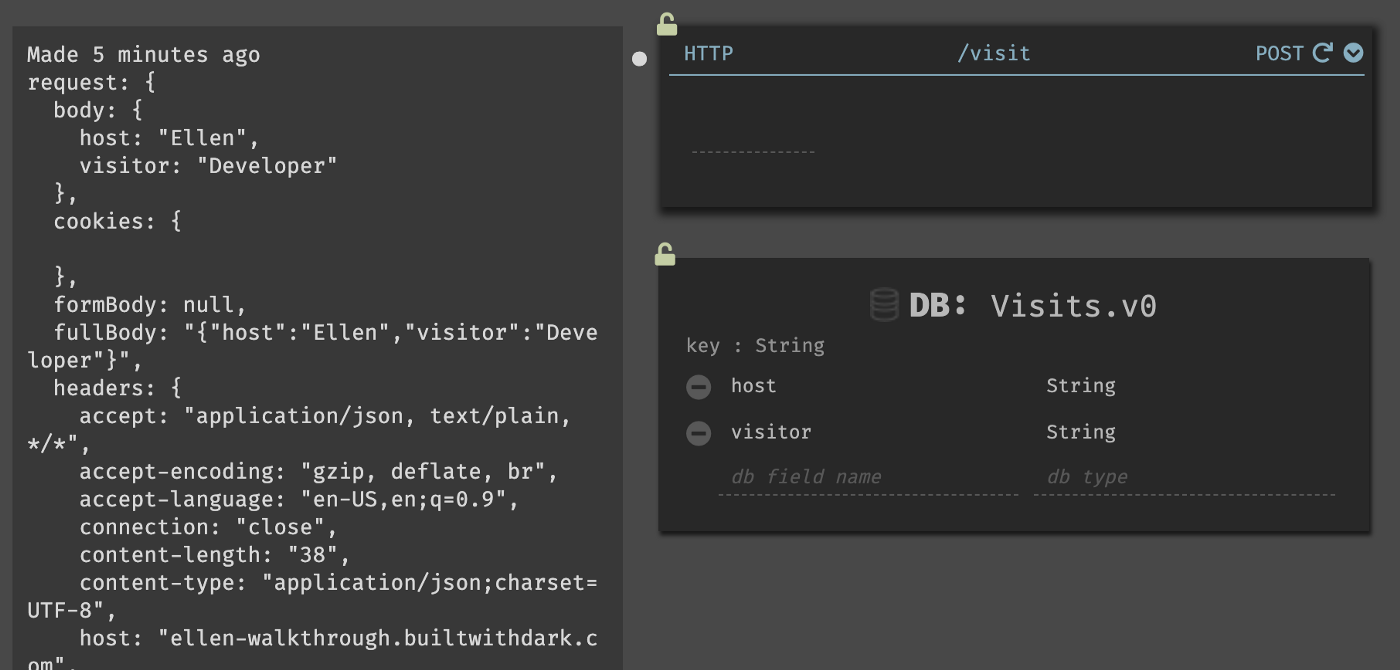
Let’s set up the Visit API. This has a very similar workflow (fill out the form, create the /visit endpoint, and then build with the real data in mind).
Here we can see the traces being really useful, we can inspect the actual body of the request being made:
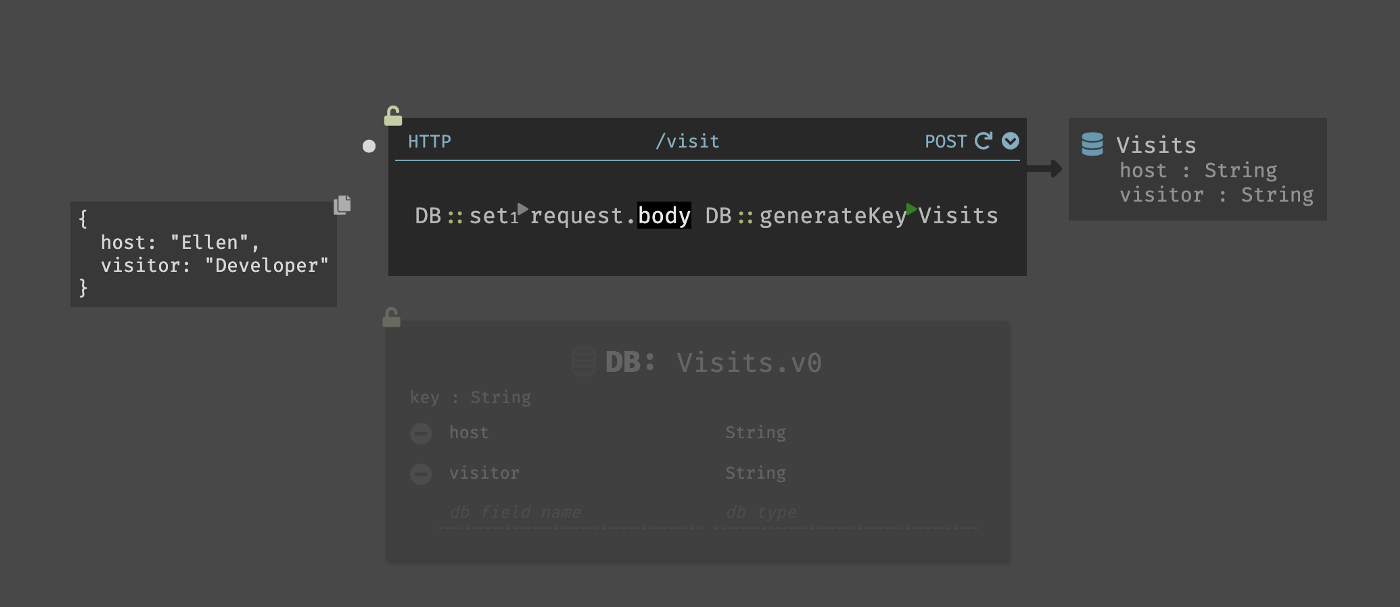
Here we’re replaying the handler with the values from this trace:
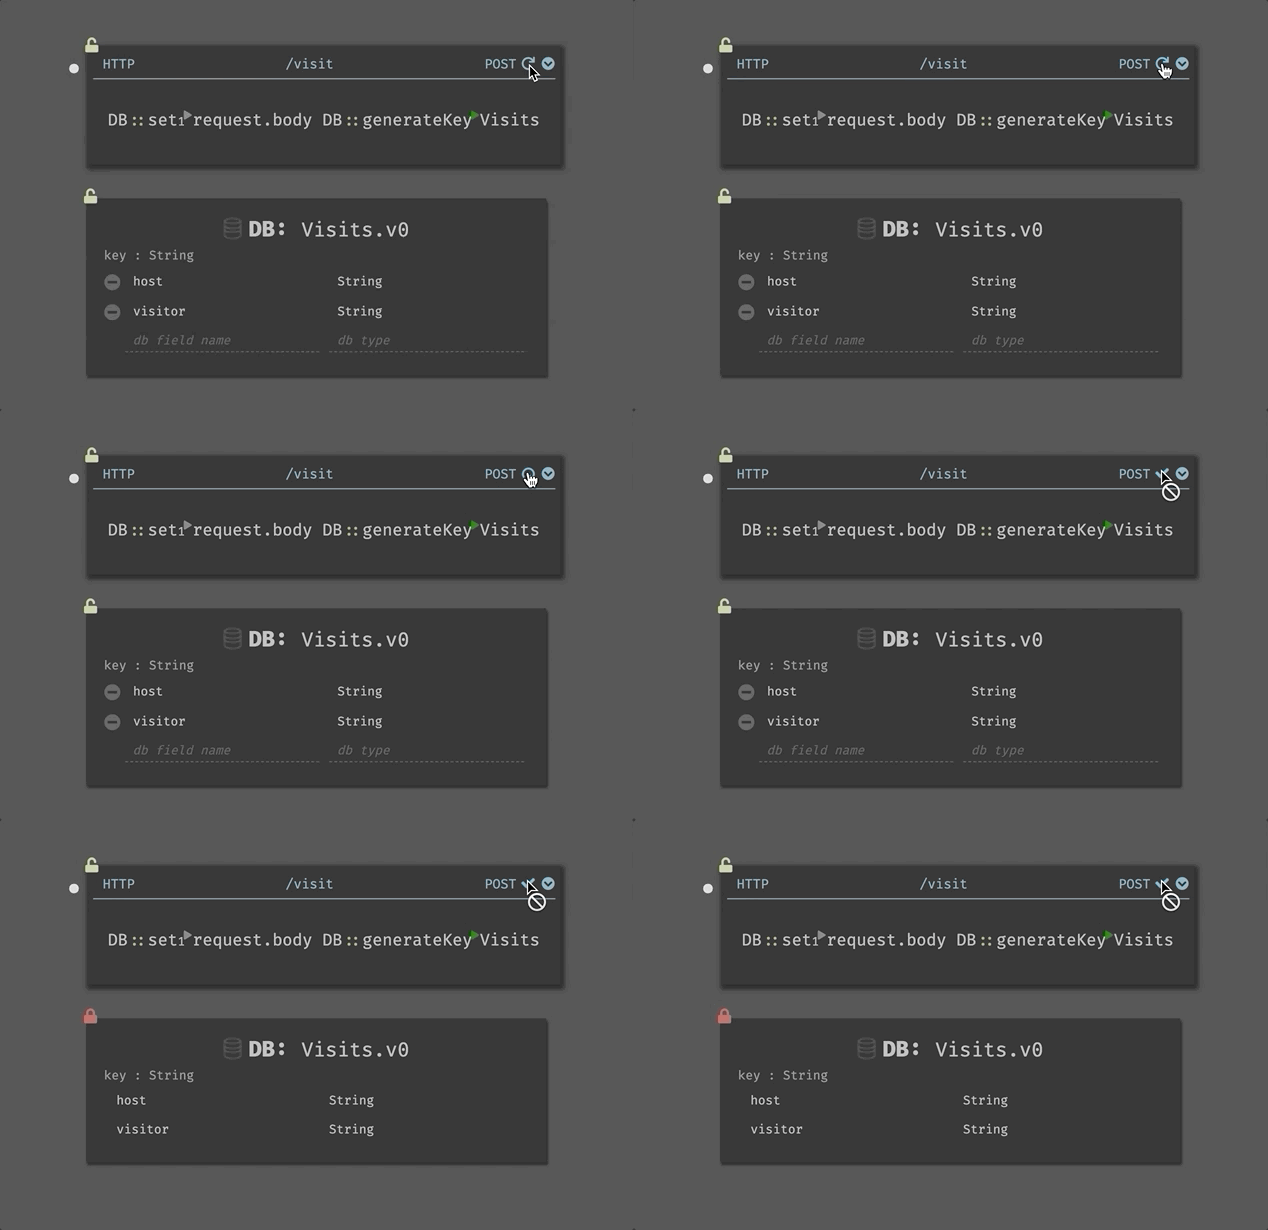
Once we’ve put data into our datastore, it locks and we’d need to run a migration to change the schema. More on how we make Dark safe in Paul’s talk, available at https://darklang.com/.
Setting up Background Workers
Lastly, let’s send our notifications (texts and Slack DMs). We want to do that in background workers.
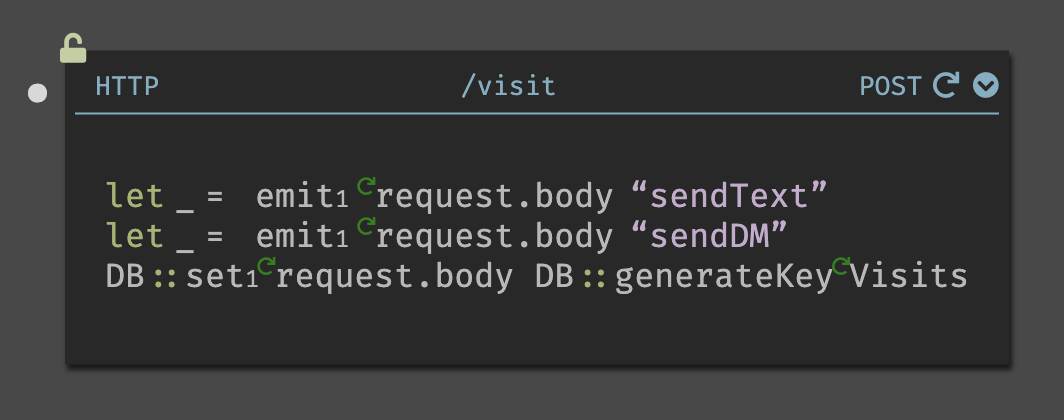
Emitted events appear the same way requests do.

Wrapped APIs
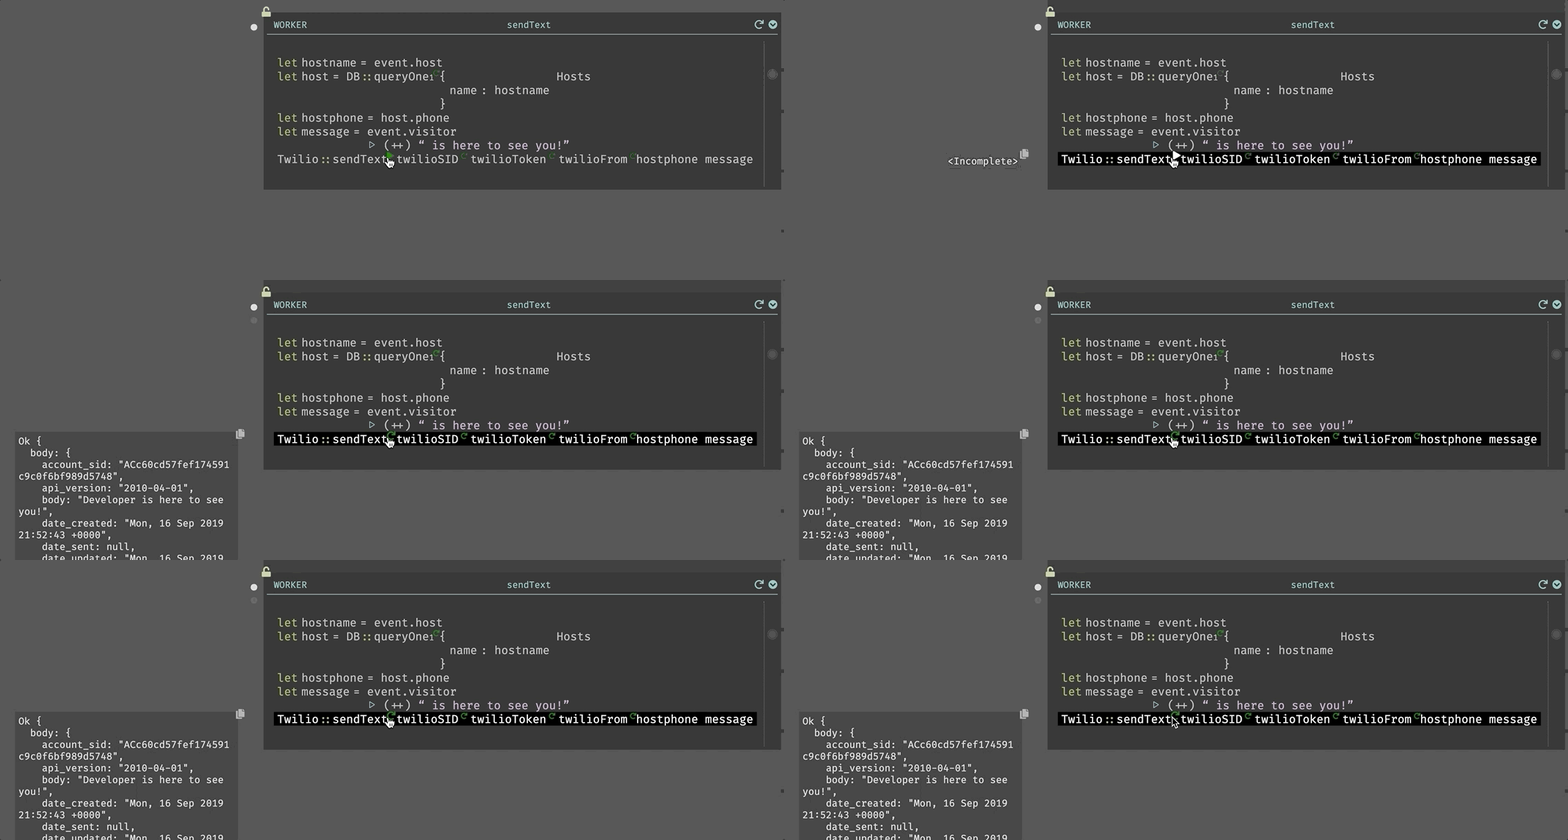
Let’s send our text using Twilio. The editor shows us the parameters in line. Here we’re using Twilio::sendText, and we see exactly which parameter goes in which place.


We execute the API call to see if it works, and see the response immediately in the editor (in this case, an Ok response).
HTTPClient Library
Dark has a built-in HTTPClient library for calling external APIs.
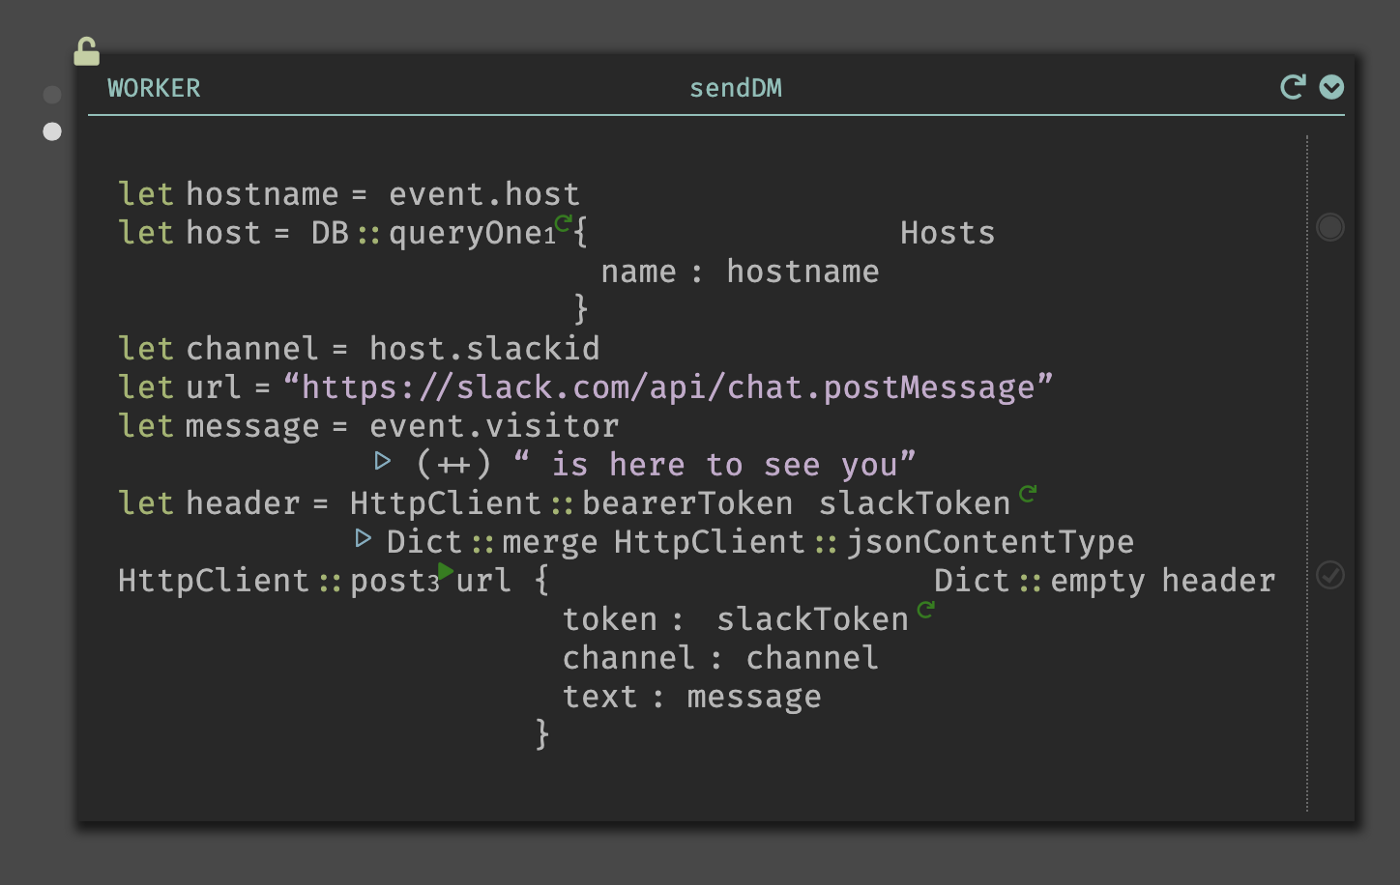
Again, the editor shows the actual response from our request.

Putting it all together
The result is a working application.
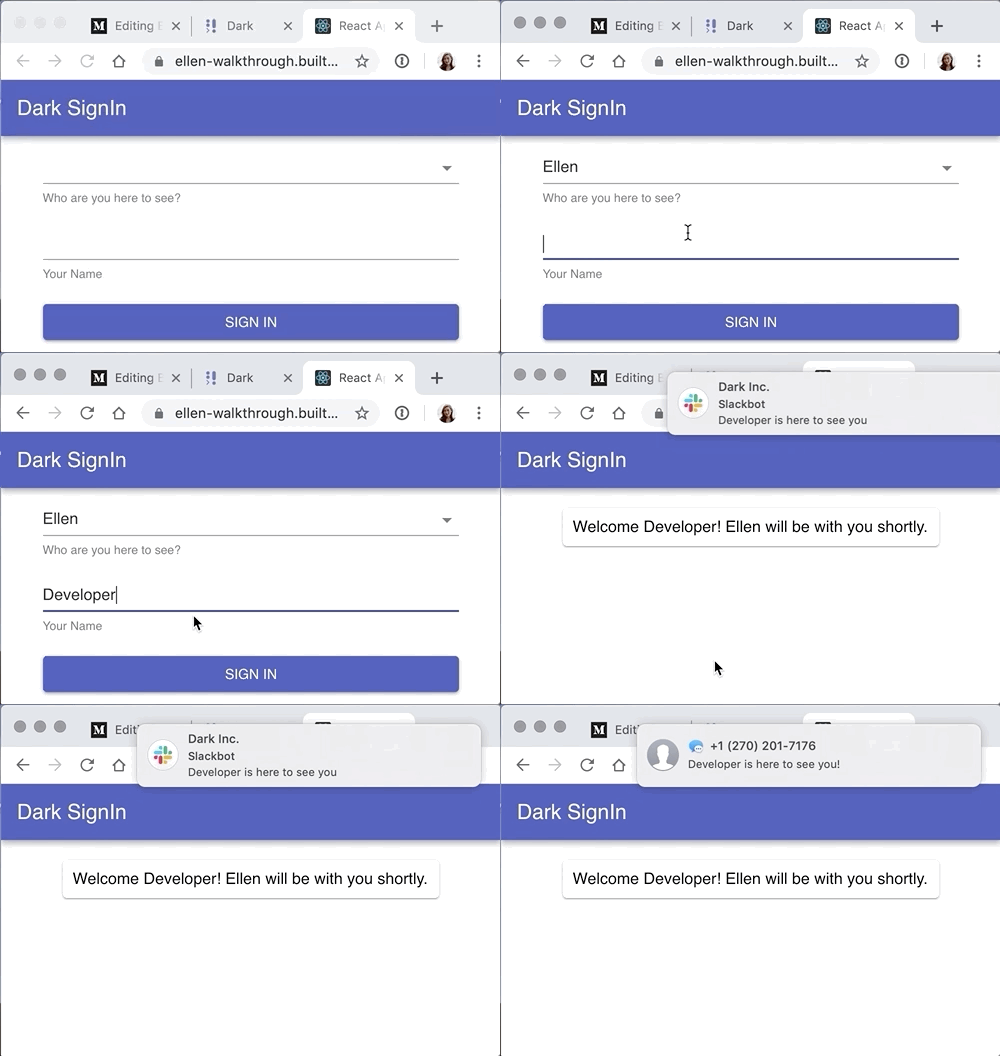
Our office sign in application consists of a hosted React frontend, datastores, HTTP endpoints, and background workers that talk to external APIs, as well as a tool to enable us to add hosts. Dark can also do scheduled jobs, but we didn’t need that in this case.
What’s more interesting is all the things we didn’t do:
- We didn’t set up any tooling or environment.
- We didn’t have to spend time thinking about our infrastructure (databases, the AWS dashboard, etc).
- We didn’t have to worry about a deployment pipeline, or deploying at all!
That’s the promise of Dark. You can code your backend, but without worrying about accidental complexity.
Interested in trying out Dark? You can sign up more, and request earlier access (even immediate access!) at https://darklang.com/beta
